I used one package of the Christmas Lane Simply Scrappin' Kit (item# 124007 p.26 of the 2011 Holiday Mini $21.95) plus 20 pieces of Whisper White card stock (item# 100730 40 sheets $8.50) to make 40 Christmas cards.. and I still have enough supplies to make at least 10 if not 20 more cards! I typically made 2 of each design of the cards. Some of the cards I made with slight variations to give you an idea of how slight adjustments or accessories change the look of the card. I used the Teeny Tiny Wishes (item# 115370 $36.95 p.157 2011-12 Idea Book & Catalog - wood mount only) Merry Christmas stamp on all of these cards.
In this first set of stockings cards I used the Stocking Builder Punch (Holiday Mini p.34 $16.95 item# 124095 - also has a matching stamp set). I used white liquid applique on the white pieces of the stocking. The border punch is the Scallop Trim Border (p.210-211 IB&C 30 $15.95 item# 118402). I used the new Dazzling Details glitter glue (p.41 item# 124117 $2.50 Holiay Mini) on the circles and on many more cards.
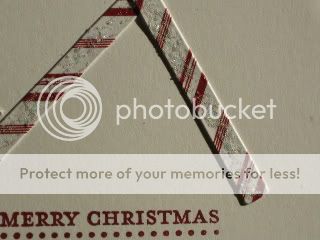
In the Christmas Tree card below I used the Stocking Accents Originals Die (Holday mini p.24 item#124099 $17.95). I drew the red circles on the trees with my Cherry Cobbler marker, topped the trees with a rhinestone as a star. I colored in the tree stump with Early Espresso marker. I framed the card with the Cherry Cobbler 3/8" quilted satin ribbon (p.30 Holiday Mini item#124105 $7.95 10 yds).
On the next card I used the Ornament Punch (p.210 IB&C #12 119847 $16.95), 1/8" Real Red tafetta ribbon (p.195 IB&C #119251 $5.95 10 yds), and more glitter glue.
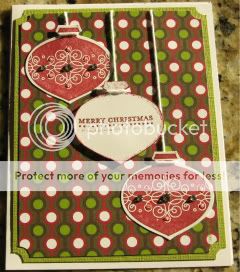
On the next set of cards I used the Ticket Corner punch (p.212 IB&C itetm# 119867 $6.95 #34). I also used white bake's twine (Summer Mini p.10item# 124262 $2.95 25 yds). I used a lot of Stampin dimesionals throughout these cards (here to raise the ornament with the sentiment).
On the next set I embossed with the Northern Flurry embossing folder (p.219 IB&C 120902 $7.95). I also used a glitter brad, more quilted ribbon, and glitter glue. You can see how my camera makes this look like two different colors, but the top picture is more true color, taken in the sunshine. :)
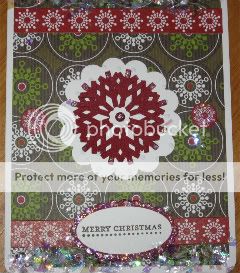
OK.. this post is taking forever to load, so I am going to shorten up the descrptions a bit. If you need more details please email me. The next card uses the snowflake punch (cut 2 & layered), large circle punch, scalloped oval punch, large oval punch, mica flakes, and glitter glue.
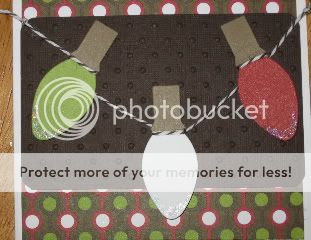
On the next card I used the scallop edge punch, dots embossing folder, glitter glue, bakers twine, and the light stickers from the kit. I put dimensionals on the back of the stickers, left the tabs on the back of the dimensionals and put baby powder on the back of the stickers to make them non-sticky!
This card is just stickers from the kit and some glitter glue added on top. It was so simple, yet one of my personal favorites!
This card I used the Dotted Scallop Ribbon border punch, ruffled ribbon, and large scalloped circle punch.
The next card is all stickers from the kit, except the ribbon & gem!! I hand wrote Merry Christmas on the tag.
This cards below I used the Eyelet Border punch, scalloped circle punch, ruffled ribbon, glitter glue and my essential white gel pen!
I used the stocking punch. the sticker in the middle is a sticker in the kit, quiltedsatin ribbon, and the scallop trim border punch.
The wreath is a sticker I mounted on a circle from the large circle punch, scallop trim border punch again.
This is another simple card I used the Simply Scored to score the lines, the circles on the corners are stickers, the big snowflake is a sticker in the kit that I added glitter glue and gems to.
This is ornament punch and border stickers from the kit. The sentiment punched with the large oval.
This card I made the tree from the Pennant die!The lights I added are border stickers trimmed and added glitter glue to, the small star punch added glitter glue, pearls on the tree too.
I used the scallop border punch, stockings sticker from the kit, baker's twine, new Snow Burst Embossing folder (Holiday mini). and of course more glitter glue!
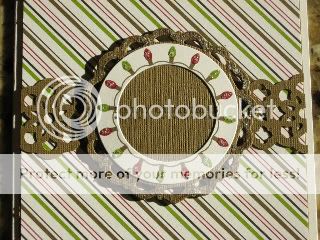
The center of this card is the Designer Series Paper in the kit, the scallop border is matching border stickers, Lace Ribbon Border punch in the center, the circle lights is a stickr in the kit, the doily I put it on is from the Pennant die, red border sticker, glitter glue.. and voila! :)
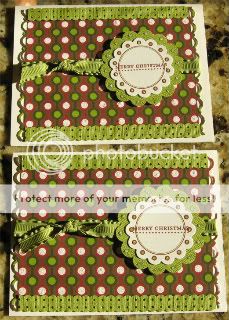
This is another simple card and another of my favs! The candy canes are stickers from the kit I put on a salloped circle I embellished with white gel dots I popped the whole piece up with Dimensionals, the striped circles are stickers from the kit I adde glitter glue to. I purposely made these 2 cards differently.. notice the striped embossing folderon the brown card stock on the right how it adds so much texture and keeps with the stripe theme of the card.
I guess I had lots of favs with this bunch because I really like this one, too! I used the Petite Pennants Builder punch to make the banner, then added the tiny tree stickers from the kit, popped the pennants up & tied with bakers twine.. add some ribbon & the scalloped oval/large oval punch... done!